
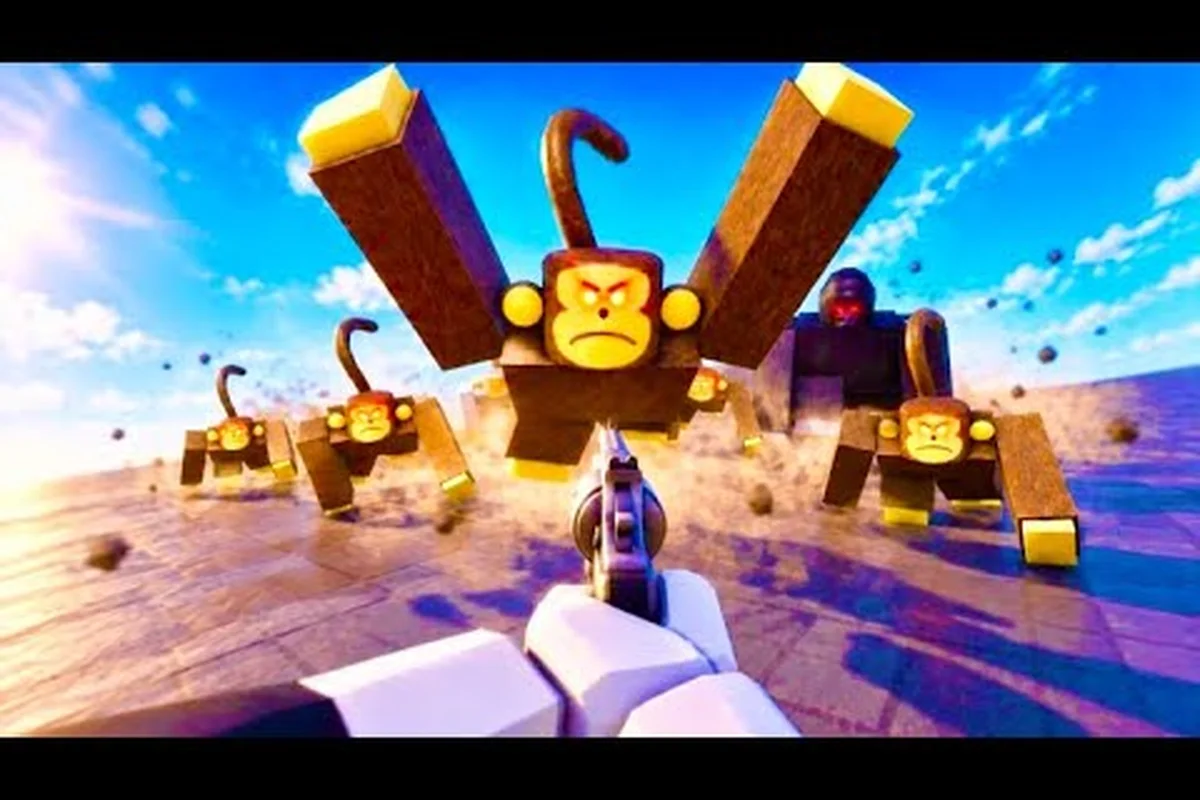
New players in Survive a Million Monkeys often lose runs not because they lack skill, but because they repeat the same survivable errors. Understanding the survive a million monkeys common mistakes early saves you hours of wasted Cash and Gems. This guide breaks down the exact missteps that wipe fresh survivors, so you can bank your first Gems instead of feeding the horde.
Why Most New Players Die in the First Three Waves
The opening minutes of Survive a Million Monkeys feel deceptively calm, which is precisely why so many runs end before the first real escalation. Players treat the early waves as a tutorial and spend their starting Cash on the wrong upgrades, then get overrun when the monkey density spikes. According to the official Survive a Million Monkeys page, the game has passed 8.2 million visits with a 96.9 percent positive community rating, which means a huge number of players have experienced this exact early-game wall.
The core loop is simple on paper: you earn Cash during a run to raise weapon tier, boost health, and place turrets or barricades, then survive long enough to bank Gems in the hub. The problem is that the loop punishes passive play almost immediately. Standing still for even a few seconds in a dense wave is one of the most common ways to die, because the monkeys swarm from multiple angles and your starting weapon cannot clear a full circle fast enough.
The False Comfort of the Starting Weapon
Your first weapon feels adequate for the first two waves, which creates a dangerous illusion of safety. Players who delay their first weapon tier upgrade because "it is working fine" usually get surrounded during wave three or four. The monkey count scales faster than your base damage output, so the gap between feeling safe and being overwhelmed is only about thirty seconds.
A better mental model is to treat every wave as a DPS check. If you cannot clear the monkeys in front of you before the ones behind you close the distance, you are already behind the curve. Upgrading weapon tier early is not an optimization; it is the baseline requirement for staying alive.
The Standing Still Trap
Movement is your primary defensive tool in Survive a Million Monkeys, yet new players constantly plant themselves in one spot to aim. This works in slow shooters but fails catastrophically here because the monkeys do not pause or take cover. They run directly at you in a continuous stream, and any stationary player becomes a magnet for the entire wave.
The fix is to strafe constantly while firing, even when your aim suffers. A moving target takes dramatically fewer hits because the monkey pathing has to recalculate constantly. Players who master the shoot-and-strafe rhythm survive significantly longer than those who prioritize perfect accuracy over positioning.
| Early-Game Mistake | What Happens | Better Approach |
|---|---|---|
| Delaying weapon tier upgrade | Wave three overrun | Upgrade weapon tier after wave one |
| Standing still to aim | Swarmed from all sides | Strafe constantly while firing |
| Ignoring barricades | No fallback position | Place one barricade before wave four |
| Spending all Cash on health | Not enough damage | Balance health and weapon tier |
| Saving Gems for later | No permanent progress | Bank Gems in hub after every run |
Wasted Upgrades That Sabotage Your Run
Cash is a limited resource in every run, and spending it on the wrong stat at the wrong time is one of the most common survive a million monkeys common mistakes. The upgrade screen offers several tempting options, but not all of them provide equal value in the early game. Players who spread their Cash across every category end up mediocre at everything, which means they die to both chip damage and overwhelming swarms.
The most efficient early-game strategy is to focus on weapon tier first, then health, then turrets or barricades depending on your playstyle. This priority order matters because weapon tier multiplies your damage output, which reduces the number of monkeys that ever reach you. Health only helps after you are already taking hits, which means it is a reactive upgrade rather than a proactive one.
The Health-First Fallacy
Many new players pour their first several hundred Cash into health because it feels safe. The logic seems sound: more health means more mistakes you can survive. But in practice, health-first players end up taking more total damage because they cannot kill monkeys fast enough to reduce the incoming pressure.
Think of it this way: a weapon tier upgrade might reduce the monkeys reaching you by forty percent, while a health upgrade only extends your survival time by a few seconds under the same pressure. The weapon tier is the better investment because it addresses the root cause of the damage rather than the symptom.
Dropping Turrets in the Wrong Spots
Turrets are powerful force multipliers, but only when placed with intent. New players often drop turrets in the center of the map or right next to themselves, which wastes their coverage potential. A central turret covers less total area than one placed at a chokepoint, because the monkeys approach from the edges and the center turret spends most of its time rotating.
The best turret spots are corners or narrow passages where the monkey pathing funnels them into a tight line. A turret in a chokepoint can hold an entire side of the map by itself, freeing you to focus on the other direction. This is the difference between a turret that gets twenty kills and one that gets two hundred.
| Upgrade Priority | Early Game Value | Mid Game Value | Late Game Value |
|---|---|---|---|
| Weapon Tier | Very High | High | Medium |
| Health | Medium | High | Very High |
| Turrets | High | Very High | High |
| Barricades | Medium | High | Very High |
| Movement Speed | Low | Medium | High |
Positioning Errors That Feed the Horde
Where you stand matters as much as what you buy. Survive a Million Monkeys spawns monkeys from multiple directions, which means your position determines how many angles of attack you have to manage. Players who fight in open ground get surrounded quickly, while players who hug walls or corners reduce their exposure by half or more.
The ideal position changes from wave to wave, but the principle stays the same: minimize the number of directions from which monkeys can reach you. A wall at your back means one less angle to watch. A corner means two less. This positional advantage is worth more than any single upgrade because it multiplies the value of everything else you buy.
Fighting in Open Ground
Open ground is the worst place to fight in Survive a Million Monkeys, yet it is where most new players instinctively stand. The center of the map feels safe because you can see everything, but seeing everything means everything can also see you. You end up fighting a full circle of monkeys with no cover and no fallback position.
The solution is to rotate toward the map edges and use walls, rocks, or barricades to limit your exposure. Even a small amount of cover dramatically reduces the incoming damage because the monkeys have to path around it, which bunches them up and makes them easier to kill.
Ignoring Barricade Synergy
Barricades are not just walls; they are tools for shaping the battlefield. A well-placed barricade can create a chokepoint that funnels monkeys into your turret's line of fire, effectively doubling your damage output. New players often treat barricades as decorative or place them randomly, which wastes their strategic potential.
The strongest setups combine barricades and turrets into a kill zone. You place a barricade to block the widest approach, then position a turret to cover the narrow gap the monkeys are forced through. This setup can hold an entire flank by itself, letting you focus your weapon on the other side of the map.
The No-Fallback Problem
Every position should have an escape route. Players who commit to a corner with no way out get trapped when the wave intensity spikes, because they have nowhere to retreat when the monkeys overwhelm their defenses. A good position is one you can leave quickly if the pressure becomes unsustainable.
The best survivors always know where they are going next. They hold a position as long as it is working, then rotate to a fresh spot before the monkeys fully surround them. This hit-and-move rhythm keeps the horde chasing you instead of cornering you, which is the core survival loop of the entire game.
The Gem Banking Mistake That Stalls Progression
Gems are the permanent currency in Survive a Million Monkeys, and the way you handle them determines how fast your account progresses. New players often make one of two errors: they either ignore Gems entirely because they do not understand their value, or they hoard them waiting for a "perfect" purchase that never comes. Both mistakes stall progression significantly.
The correct approach is to bank Gems in the hub after every run, even if the amount feels small. Gems are the bridge between runs, and every Gem you bank makes your next run slightly easier through permanent upgrades. Players who skip banking because they want to save up for a big purchase are effectively playing with one hand tied behind their back.
What to Buy First with Gems
The first permanent upgrade you should buy with Gems is anything that increases your starting power. A better starting weapon or a small starting Cash bonus compounds across every future run, which makes it the highest-value purchase in the game. Players who buy cosmetic items first are spending their most valuable resource on zero gameplay benefit.
After your starting power is improved, focus on anything that increases Gem gain or Cash gain per run. These upgrades create a positive feedback loop where each run earns more than the last, accelerating your overall progression. The earlier you start this loop, the faster you reach the mid-game content.
The "One More Run" Trap
The most dangerous Gem mistake is not banking at all. Players who think "I will bank after one more run" often die with a large pile of unbanked Gems, losing everything they earned. The game only banks Gems when you return to the hub, so every run you extend is a gamble with your accumulated progress.
The safe rule is to bank after every run, no matter how short. Even a two-minute run earns some Gems, and those Gems are permanently yours once you return to the hub. The only exception is when you are deep into a strong run and confident you can push significantly further, but even then, the risk of losing everything should give you pause.
| Gem Spending Priority | What It Does | When to Buy |
|---|---|---|
| Starting weapon upgrade | More damage from wave one | First purchase |
| Starting Cash bonus | Faster early upgrades | Second purchase |
| Gem gain increase | More Gems per run | Third purchase |
| Health boost | More survivability | Fourth purchase |
| Cosmetic items | No gameplay benefit | Last, if ever |
The Solo Tunnel Vision That Ignores Squad Value
Survive a Million Monkeys supports squad play, and ignoring it is a subtle but costly mistake. Solo players face the full weight of every wave alone, which means they need to be nearly perfect in their positioning, upgrades, and movement. Squad players can split the map, cover each other's flanks, and revive downed teammates, which dramatically reduces the individual skill requirement.
The game does not force you to play with others, but the difficulty curve assumes you are at least considering it. Many of the survive a million monkeys common mistakes become far less punishing in a squad, because a teammate can cover the angle you forgot or revive you after a positioning error. If you are struggling solo, the fastest fix might be finding a squad rather than grinding for better upgrades.
How Squads Change the Upgrade Math
In a squad, upgrade priorities shift because you can specialize. One player can focus on turrets while another focuses on weapon damage, creating a combined setup that is stronger than any solo build. This specialization is impossible alone, which is why solo players often feel like they need to buy everything and end up mediocre at all of it.
The squad survival guide covers the coordination basics, but the key insight is simple: a squad that communicates about upgrade roles survives dramatically longer than four players who each build solo. Even basic coordination like "I will handle turrets, you handle barricades" transforms the run.
The Revive Mechanic You Are Ignoring
Downed players in a squad can be revived, which turns a fatal mistake into a recoverable one. Solo players have no such safety net, which is why every positioning error or upgrade misstep is potentially run-ending. The revive mechanic is the single biggest reason squad play is more forgiving than solo play.
If you are committed to solo play, you need to internalize that every mistake is final. There is no second chance, no teammate to pull you up, and no one to cover your retreat. This is not a reason to avoid solo play, but it is a reason to be more deliberate about every decision you make.
Frequently Asked Questions
What is the most common mistake new players make in Survive a Million Monkeys?
Standing still during dense monkey waves is the most common fatal error. New players plant themselves to aim, which lets the horde surround them from every angle. Constant strafing while firing keeps the monkey pathing recalculating, dramatically reducing incoming damage and extending every run.
Should I upgrade health or weapon tier first?
Weapon tier first, almost always. Higher damage reduces the number of monkeys that ever reach you, which addresses the root cause of incoming damage. Health only helps after you are already taking hits, making it a reactive upgrade that buys seconds rather than solving the pressure problem.
When should I bank my Gems?
Bank after every run, no matter how short. Gems only become permanent when you return to the hub, so extending a run with a large unbanked pile is a gamble with your progress. Even a two-minute run earns Gems that make your next run easier through permanent upgrades.
Is solo play viable in Survive a Million Monkeys?
Yes, but it demands more precision because every mistake is final. Squad play offers revives and role specialization that soften the difficulty curve significantly. If you are struggling solo, the beginner guide covers the fundamentals you need to tighten up.
What should I spend my first Gems on?
Starting power upgrades, specifically a better starting weapon or starting Cash bonus. These compound across every future run, making them the highest-value purchases in the game. Cosmetic items provide zero gameplay benefit and should be the absolute last thing you buy.
Avoiding the survive a million monkeys common mistakes comes down to three habits: keep moving, prioritize weapon damage over reactive health, and bank your Gems after every run. Master those fundamentals and the early-game wall that stops most new players becomes a stepping stone instead of a brick wall.